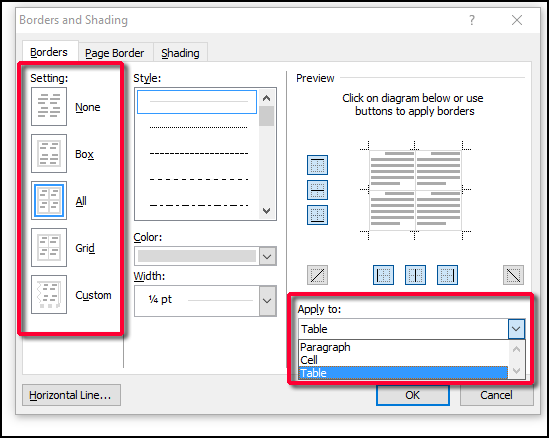
It’s easy to modify selected borders if you understand how to use the settings in the Borders and Shading dialog box. These are the setting in Word 2010. (The Setting: boxes at the left are slightly different in later versions but the idea is the same.)

In the following table there are no borders yet, only gridlines displayed, but I’m going to add them in the next steps.

Select the entire table by clicking on the crossbow at the top left. Then right-click and select Borders and Shading…

The default option under Apply to is Table. Leave that option for now. I chose red for the colors to make it easier to see and chose All.

This is what the table looks like now:

To place a heavier border under the first row as well as a heavier border just above the Totals row I first select each of the rows. For the titles I selected the first row, right-clicked and chose Borders and Shading.
On the dialog box, make sure you select Custom under Setting. This will allow you to select individual edges. Then select the width you want. Make sure that the changes apply to Cell only, NOT Table. Then click on the edge you want to change.

The result will be a thicker border only at the bottom. If all borders get thick, it means you didn’t select Custom at the left.

Now I’ll put a heavier border above the last row (already selected in the image above). These will be the settings in the figure below. Notice that Cell is again selected under Apply To and that I click on the top border after changing the Width.

Here’s the end result.

So the things to remember are that you need to choose Custom for border type and Cell for Apply to.


0 Comments